My Process
It has been said that life has many layers. So why shouldn't paintings? I use the Old Master's glazing technique to build up a rich, colorful surface that almost glows. Artists like Da Vinci, Rembrandt, and Caravaggio were known as powerful illusionists that could transform a two dimensional canvas into a three dimensional reality, something they owed in many ways to the glazing technique.
In the glazing technique, paint is thinned out by oil or a clear medium (to retain viscosity) and applied to a white or toned canvas. Several layers of colors may be applied on top of each other to achieve one final color, such as several layers of red and yellow to create a unique orange, or blue and brown to create a high-depth black.
Because the layers are not opaque, light travels through them, and reflects off of the canvas beneath, and back to your eye. The result is an unparalleled richness of color. It is similar to the way a deck with semi-transparent stain will have a lot more character and depth of color than one that is simply painted with flat brown enamel.
I fell in love with the glazing technique when I learned it from another artist years ago, and have adapted it into my own style, using high quality, non-fading acrylic paint, which has a color intensity almost as strong as oil. I love seeing the way these layers of color all come together in the end to produce a wonderful, striking image. Below is an example of one of my recent paintings, a portrait I did to commemorate my pastor's 80th birthday, showing, step by step, how I do my work.


Development of a Portrait: From Start to Finish
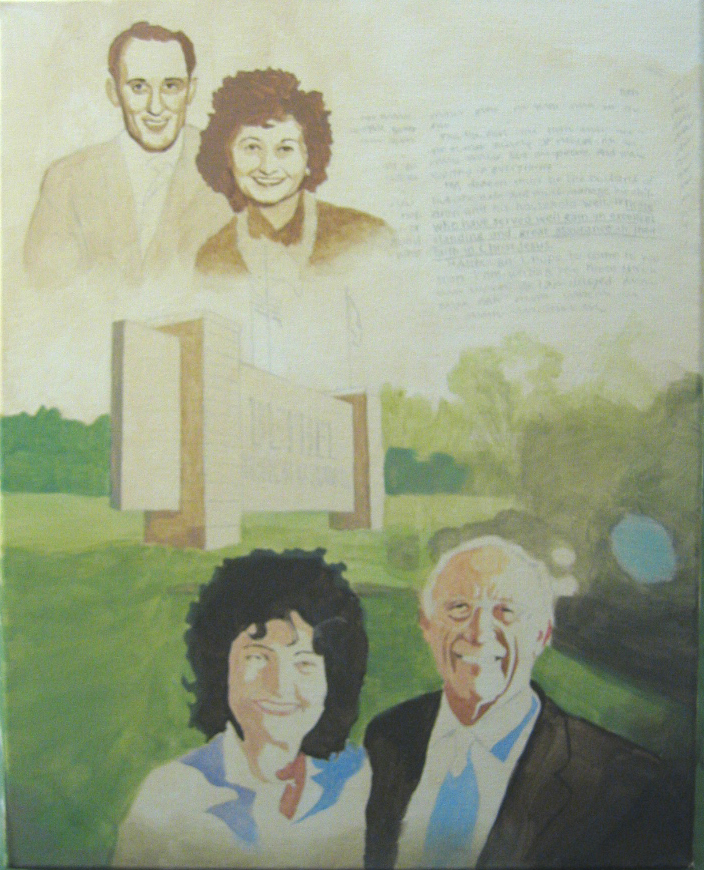
1. I start with a sketch to get the proportions down correctly. It's simply pencil on white canvas. Once the sketch is done, I seal it in with a clear acrylic medium, to prevent the pencil from being smeared while I'm painting.
2. Next, I start putting down some initial glazes, which are basically just washes of color mixed with clear medium to help it flow better. I try to block in the major "values" (difference between light and dark), such as the black color of the subject's hair.
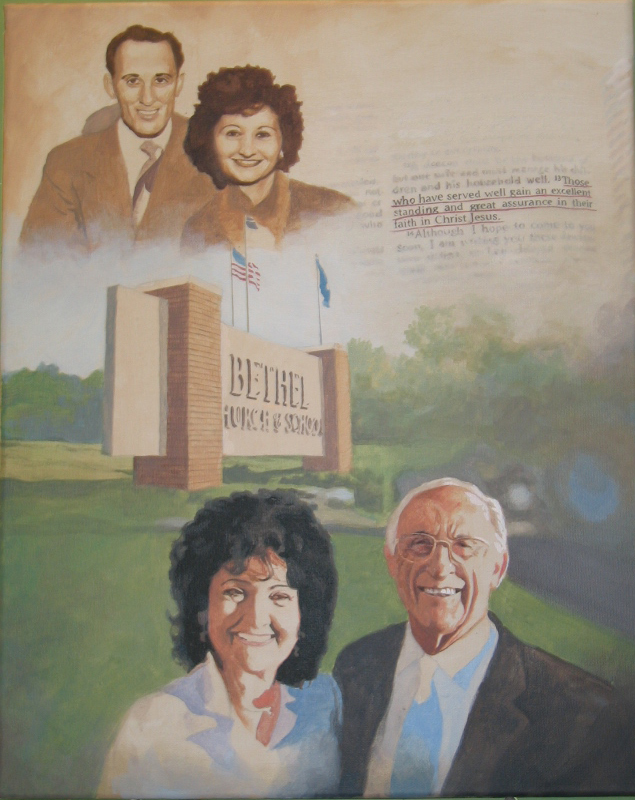
3. In this stage, I add some flesh tones to the faces, as well as a couple more glazes of green to the grass in the background. You'll notice I also blocked in some of the color and values on the church sign in the middle of the portrait.
4. The painting starts to develop as I continue to strengthen the color on the faces with more glazes. I also add a few more glazes to the background, and some detail into the church sign.
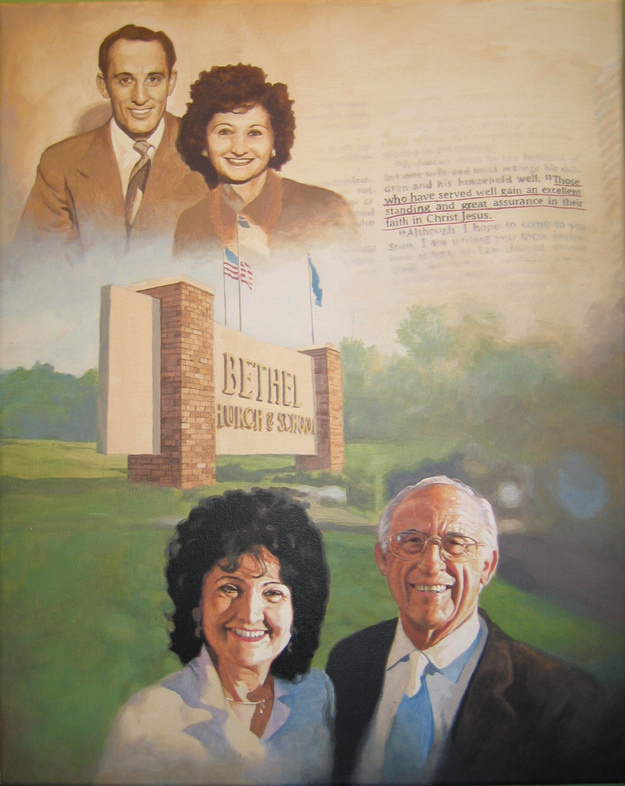
5. Although far from completed, the people in the portrait are now looking recognizable. I continue to add more glazes to everything. As I add detail, I pay particular attention to the eyes. The reason for this is because I've found that the eyes are the most important feature to render correctly, in order to capture the uniqueness of an individual.
6. At this stage, the painting could almost pass as "done," but I'm not satisfied with its appearance yet. There's still a lot of important work to do. I "tighten up" some contrasts in color and value all over the painting, and especially in the faces, with more nuances in shading and gradation being added in specific areas. On the church sign, I paint in all the bricks to make it look real.
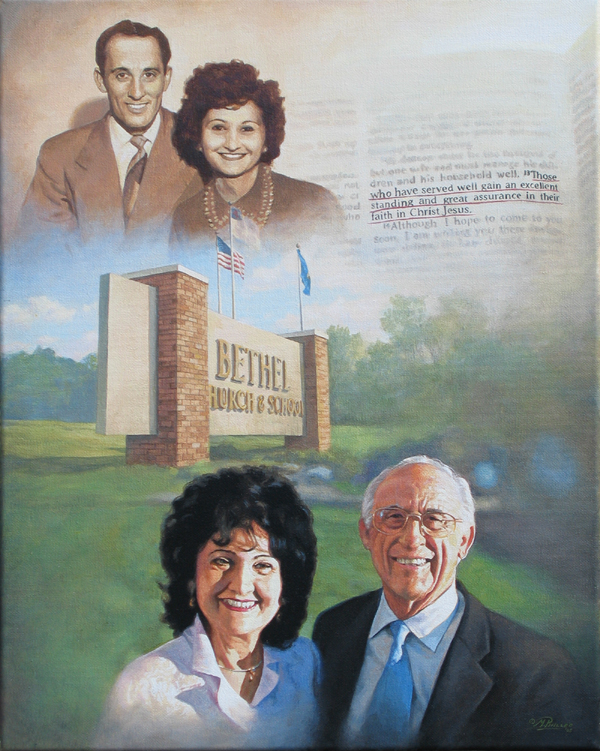
7. This is the final portrait, signed and ready to go.